FortiGate Administration via AD Group (LDAP)
FortiOS Version: 5.6.0
- Create an AD Security Group in your Active Directory domain and populate it with users that you want to grant administrative access on the FortiGate. The group should be populated with a set of users that require the same level of administrative privileges.
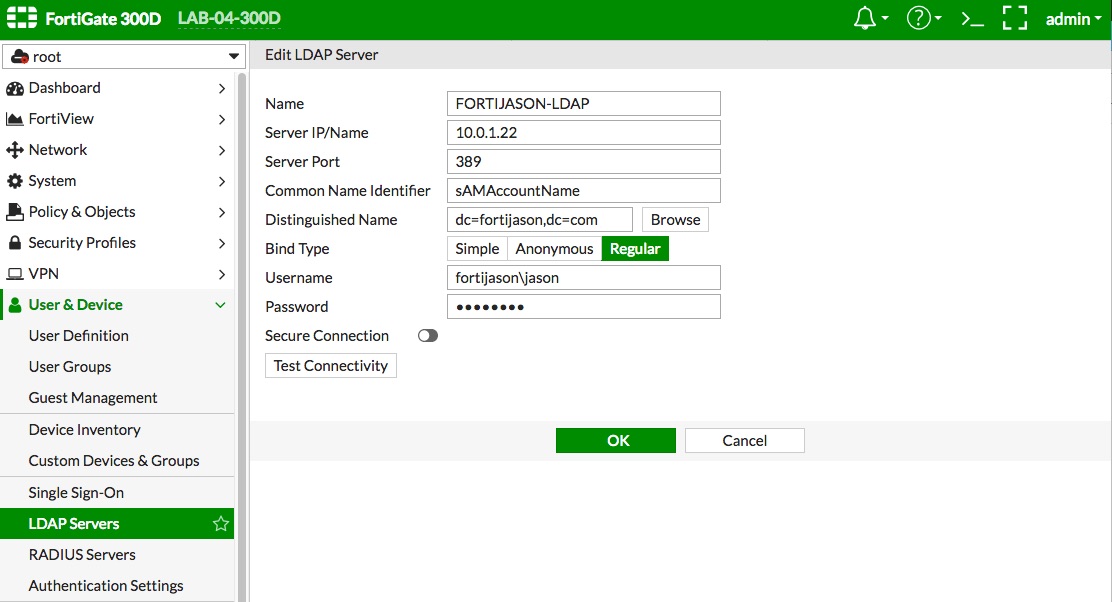
- Create an LDAP server definition on the FortiGate that points to the AD server in the "User & Device -> LDAP Servers" config context. When using AD, you need to change the "Common Name Identifier" to "sAMAccountName".
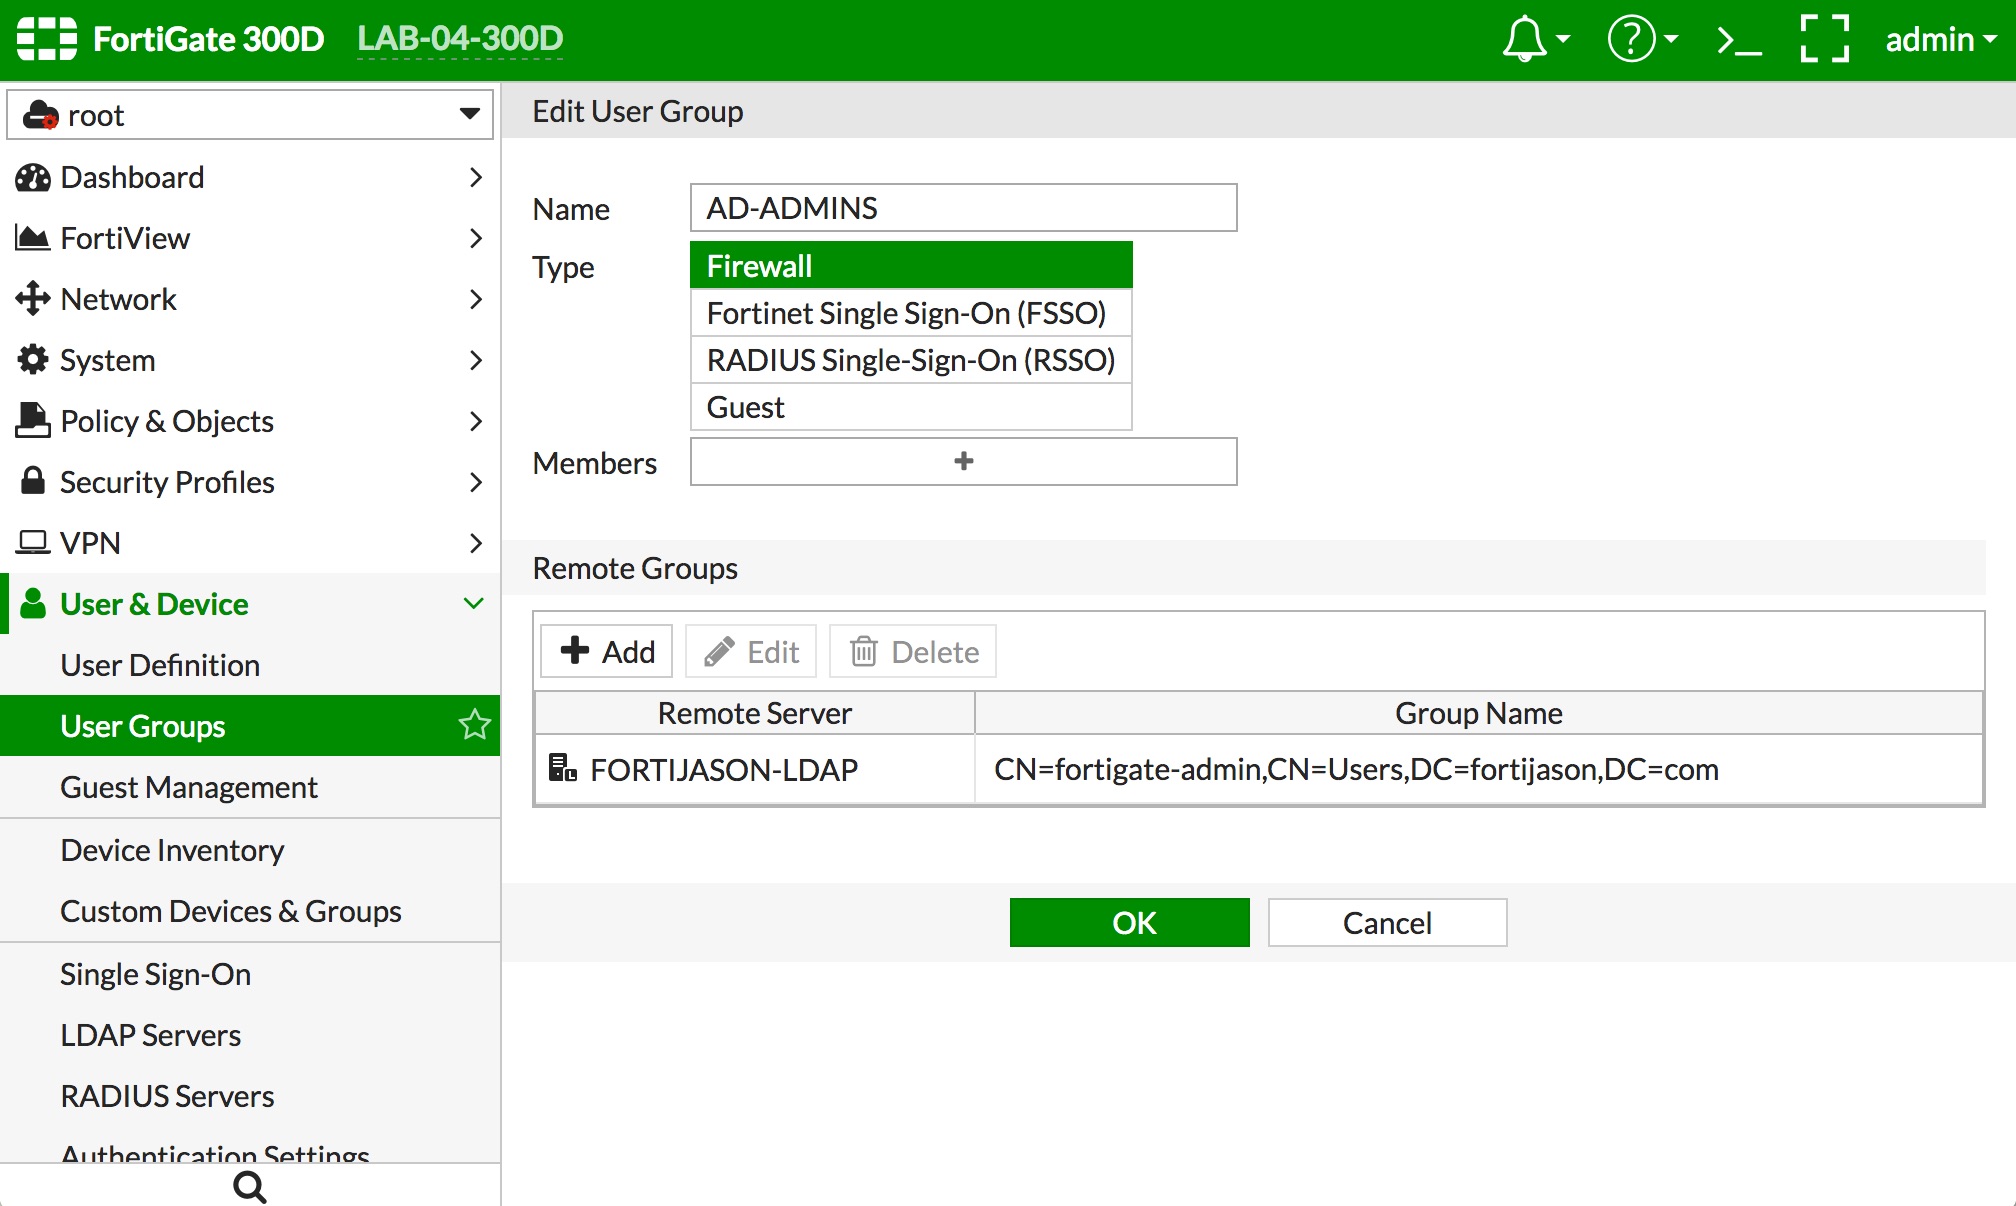
- Create a user group on the FortiGate that points to the AD Security Group via the LDAP server definition.
- Navigate to "User & Device -> User Groups" and click the "+ Create New" button.
- Type a name in the "Name" field to represent the local group definition which will point to the AD group.
- In the "Remote Groups" section, click the "+ Add" button.
- Select the LDAP server you defined in Step 2 in the "Remote Server" popup menu.
- Right click the AD Security Group you created and click "+ Add Selected."
- Click the "Selected" tab near the top to verify the correct AD group was added.
- Click the "OK" button at the bottom of the page. The result should look similar to the depiction below.
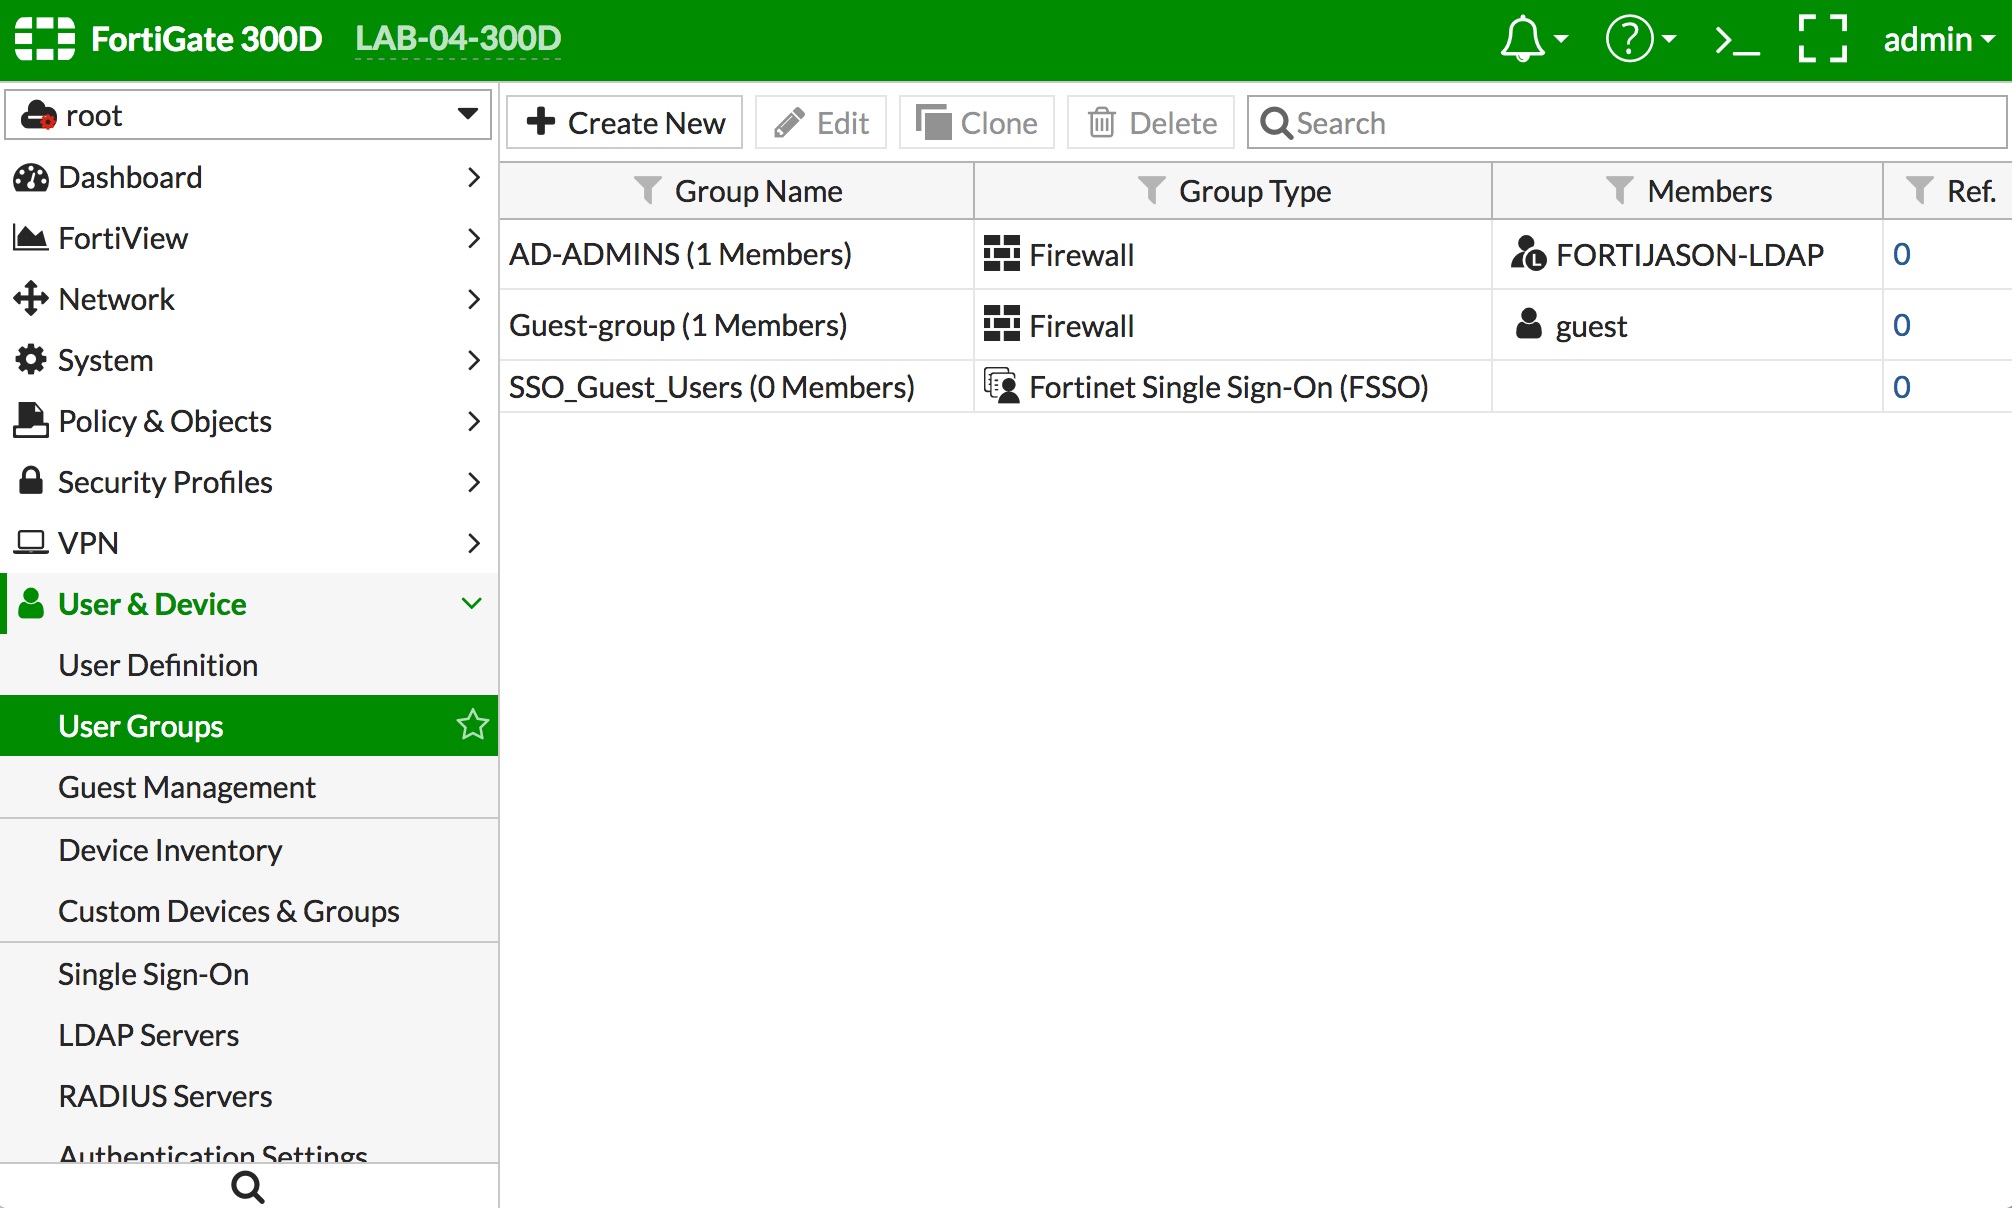
- Click the "OK" button at the bottom of the page.
- Your group definition should be in the list of groups, as the "AD-ADMINS" example below.
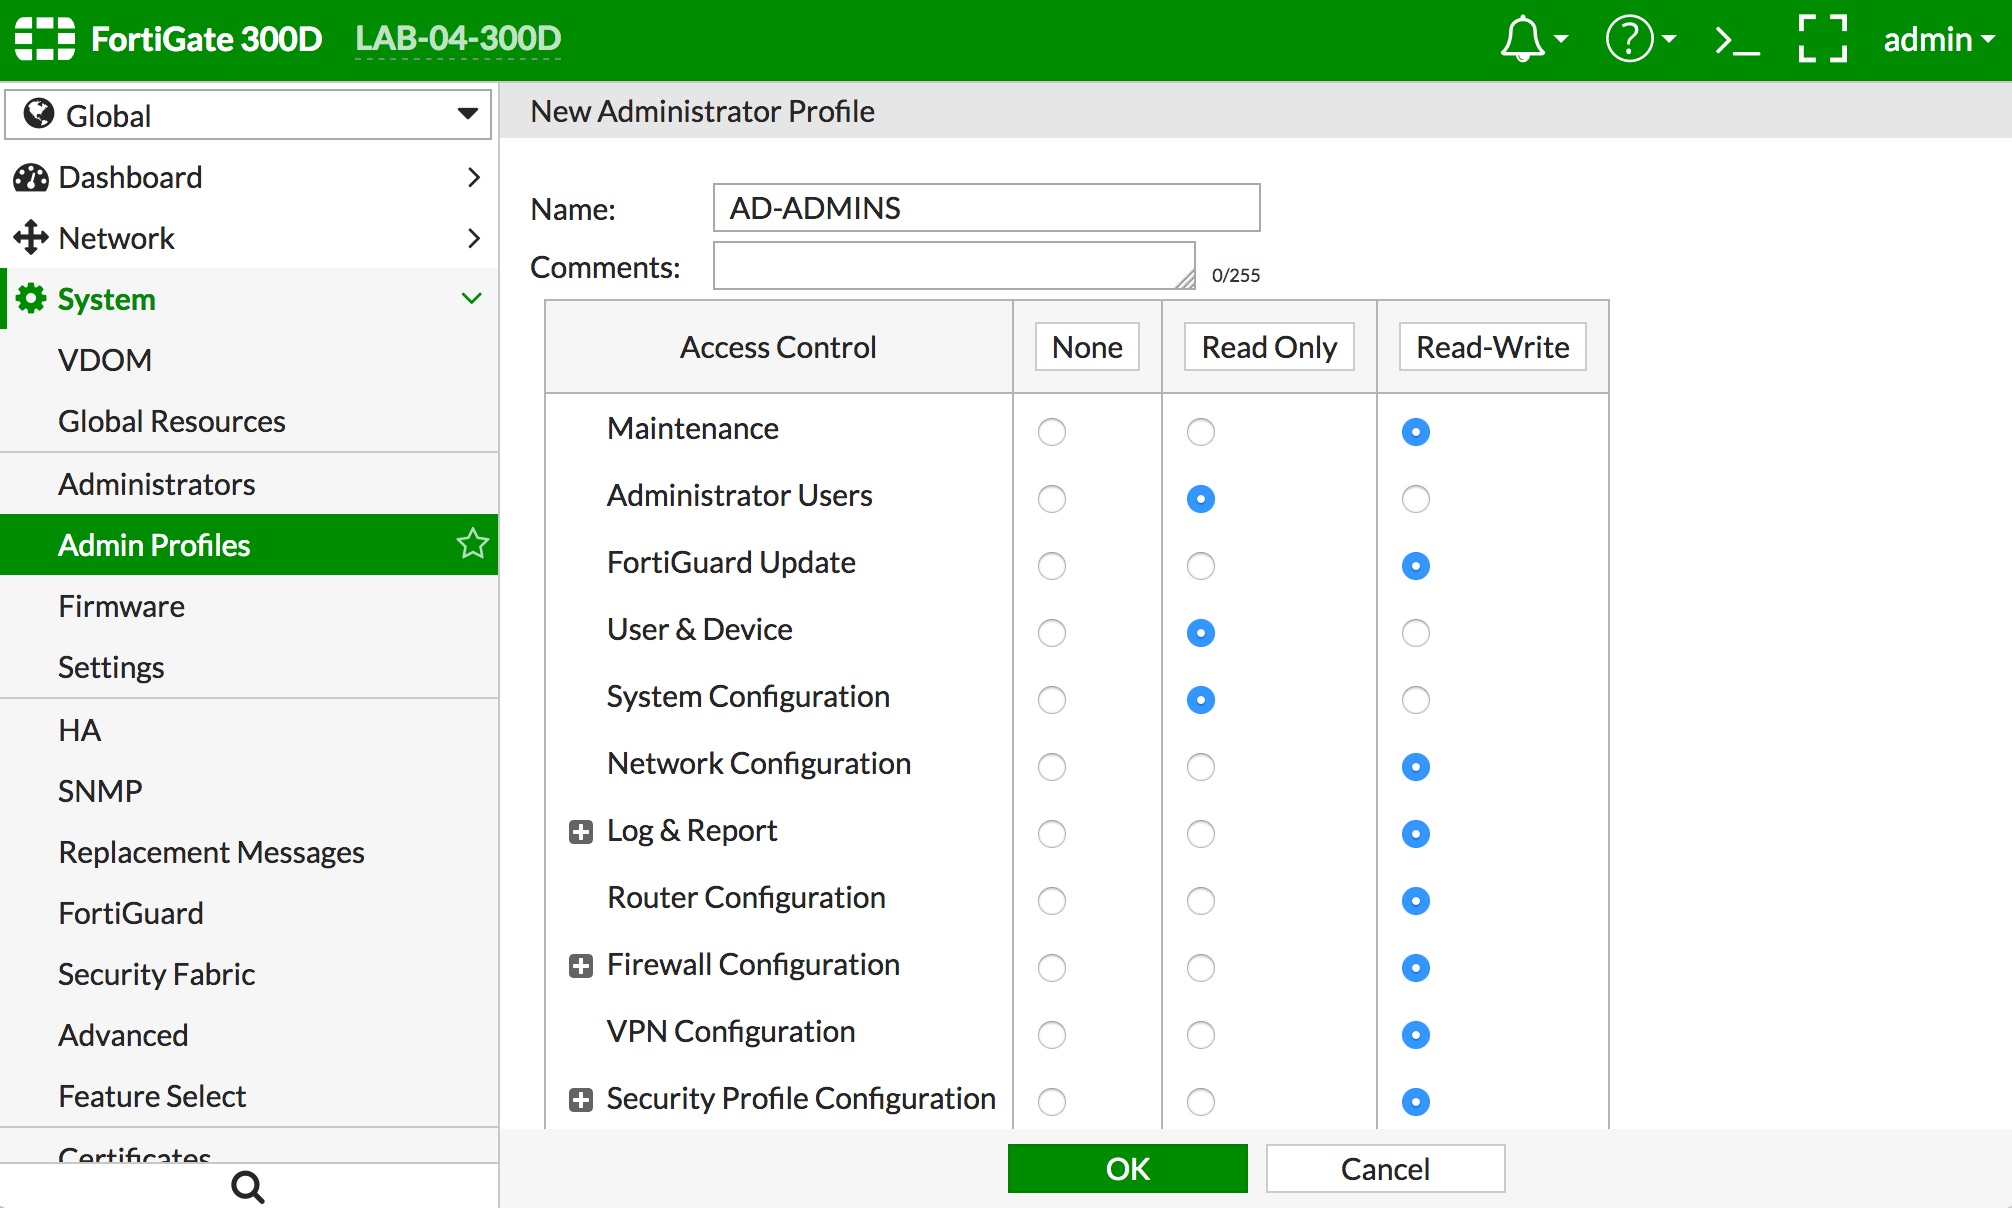
- If the default profiles do not meet your requirements, then create a new Admin Profile by navigating to "System -> Admin Profiles" and clicking the "+ Create New" button. Give the profile a name and select the rights you want to assign to the group. Click the "OK" button to save the config changes. Some of the options are shown below.
- The final step is to create a definition to allow the LDAP administrators to login and administer the FortiGate.
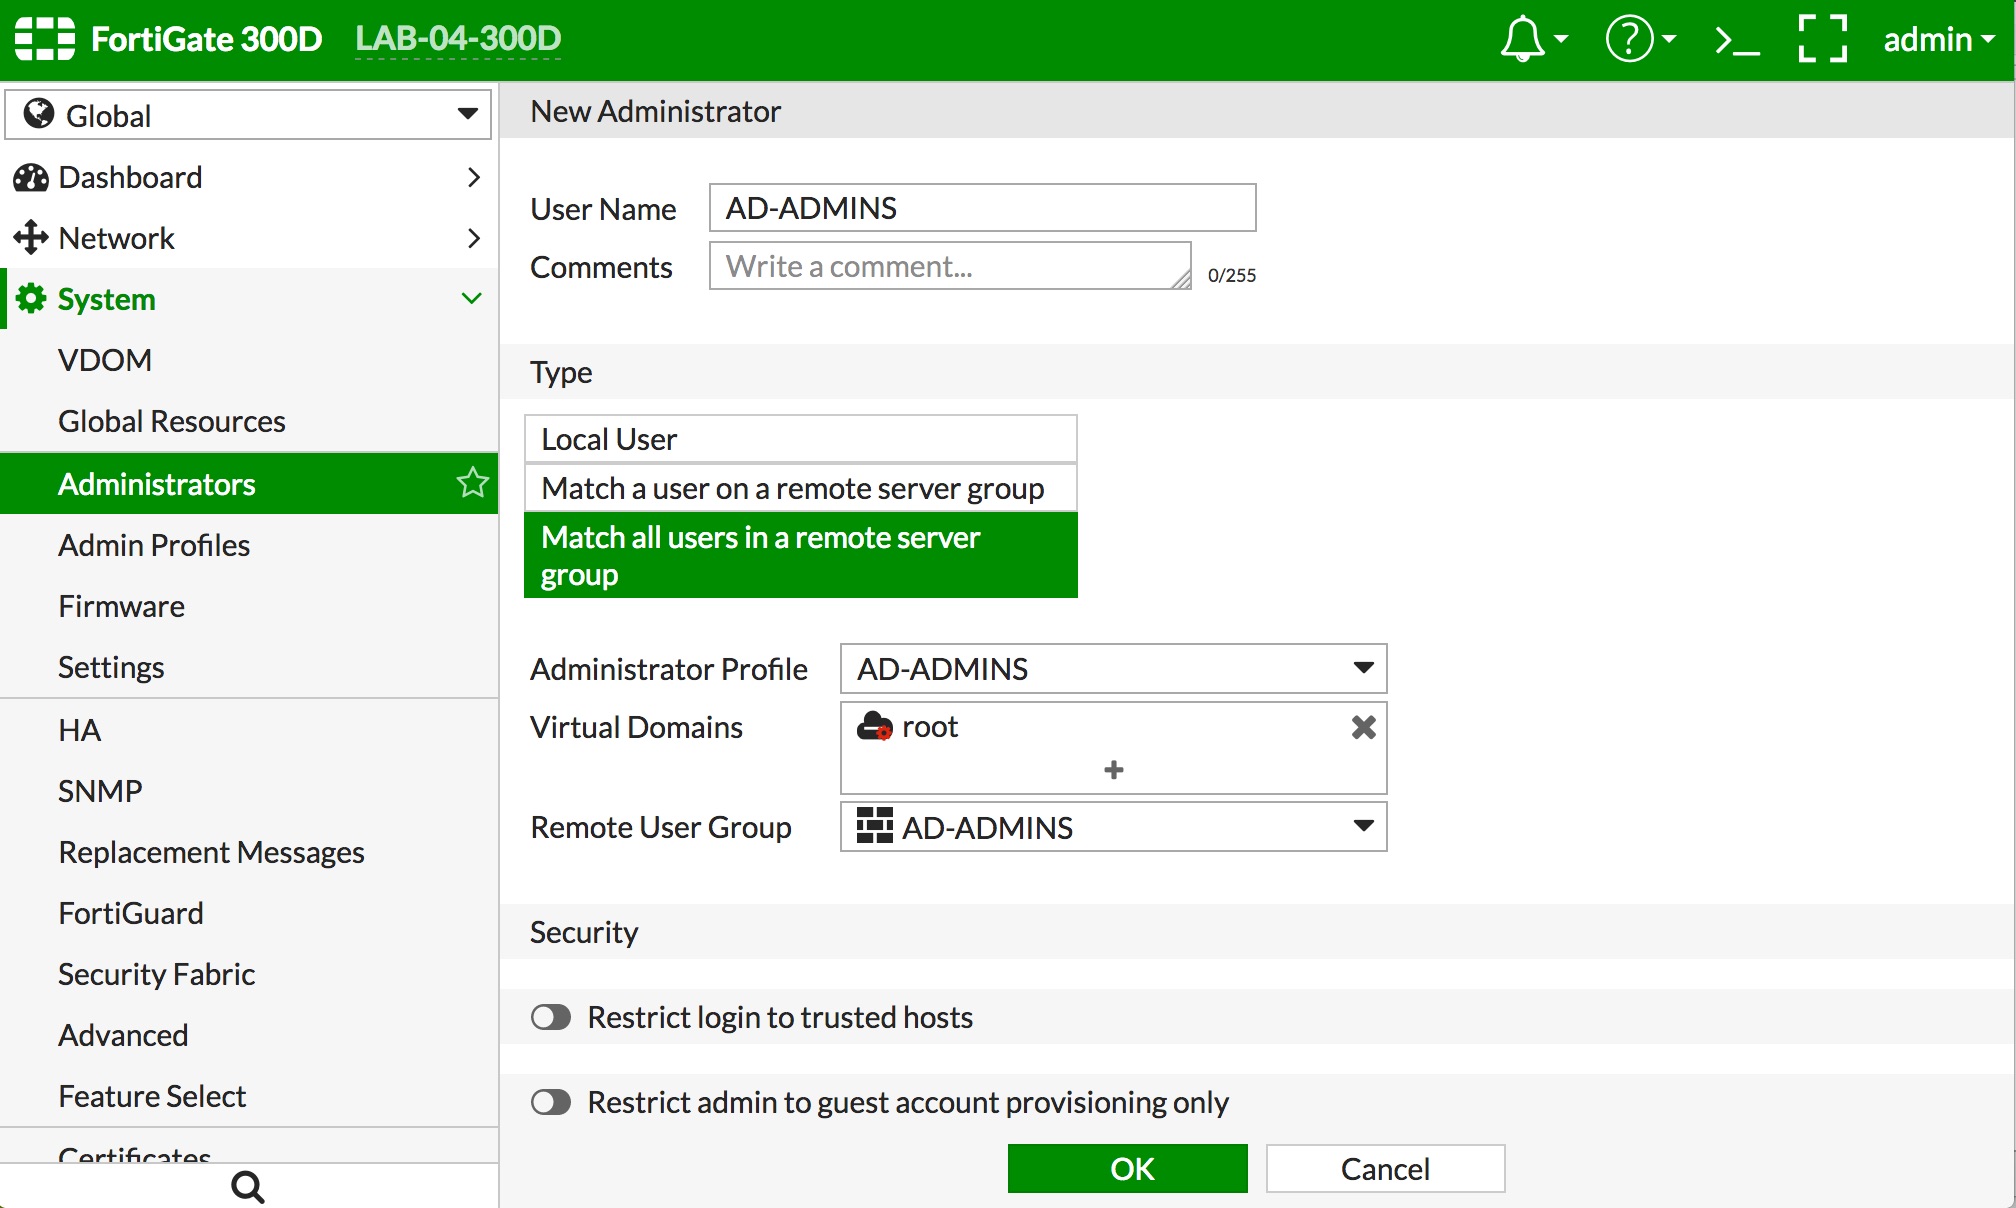
- Navigate to "System -> Administrators" and click the "+ Create New" button.
- Give the administrator definition a name that represents the AD admins in the "User Name" field.
- Select "Match all users in a remote server group" as the administrator Type
- Select the "Administrator Profile" you created in step 4 or one of the predefined admin profiles
- Select the "Virtual Domains" you want the AD admins to be able to administer. If you select the predefined "super_admin" profile, there is no option to select VDOMs, as that profile grants all rights to the FortiGate
- Select the User Group you created in Step 3 in the "Remote User Group" popup
- Move the "Restrict login to trusted hosts" slider, if you want to restrict the source IPs allowed to login to this admin group. Then populate the subnets that are allowed for admin login
- Click the "OK" button at the bottom of the screen. Examples below: